We are offfering a 15% discount on all DFX Neons pots with the discount code: SummerVibes
Mar 15, 2017
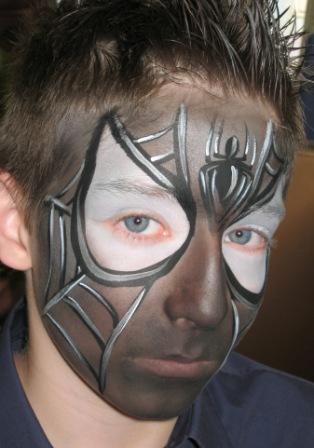
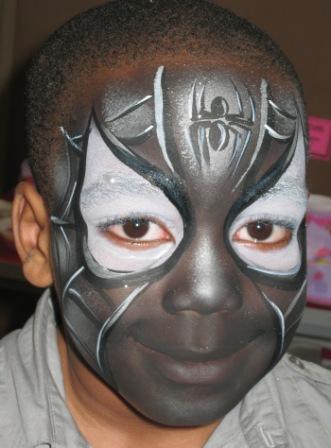
He's arrived! And being asked for already. They didn't give a thought for us poor facepainters when they dreamed this one up, but hopefully we've cracked it for you. Bibi was inundated with requests for him at a party last weekend, and took a couple of useful pictures, so we're publishing her first go at this challenge with some advice on what products to use.
You need to make a decision about which way round you're going to do this, silver background with black web, or black background with a silver web! Or do as Bibi did and do a black cake background, ordinary black will paint over this very successfully, and you can highlight it to make it extra 'shiny'. The eyes need to look silvery, the best way to keep silver shiny is to use cake white underneath, that way you don't need to be too precise about where the silver is either.
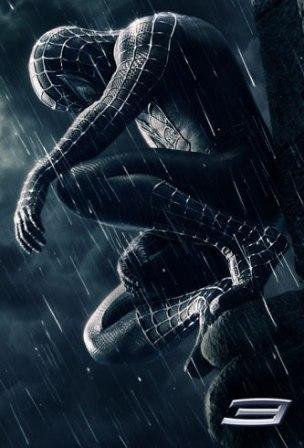
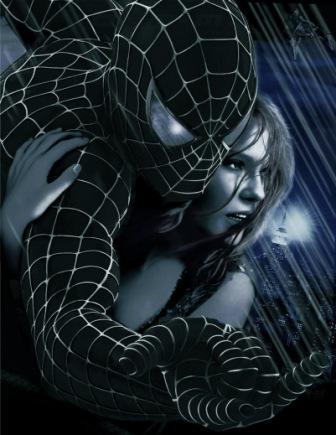
Do a Google image search for Spidrman 3 to find detailed pictures of his suit, and don't forget that the spider shape has changed like Bibi did!
GOOD LUCK!
.
PRODUCTS USED:
Background base: Grimas Cake White on eyes, Grimas Cake Black on the rest of the face with Wolfe Brothers Silver (could use Grimas
Silver or Paradise Silver Bullet) on eyes and between where the web lines will go. This gives a nice matt finish. You could use our effect stencil
to get a textured look, or some netting.
Black web lines and spider: Paradise Black
Highlight with Silver and/or white. Since discovered that Grimas 704 over black looks fab.
STEP BY STEP FOLLOWS .....
SPIDERMAN 3 STEP BY STEP
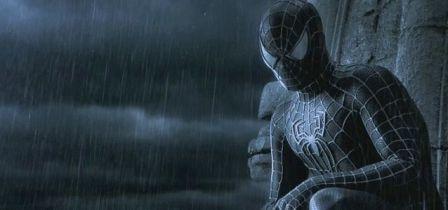
Just after posting the two photos done at a party, I saw a No.3 bus with a huge Spidey on the side, and thought, humph, not good enough. Must try harder.
So when I got home I managed to grab Henry and persuade him to go to the dark side! He was so pleased with it, that even at 17 he's gone on the evil rainy city streets of donwtown Brixton without taking it off.
So how did we do it? Like this....
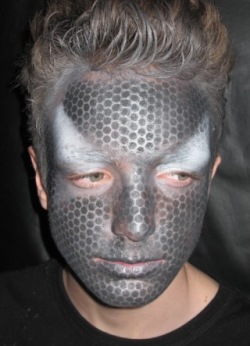
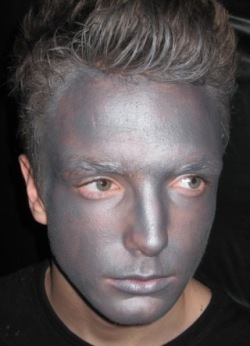 Not looking too great at this stage,
but a covering of Grimas Pearlised Silver 710 was my starting point. Having looked at the evil one again, I realised that there are lots of tones and
a texture to cope with. So I sponged some Wolfe Brothers white in the eye area and grabbed my Facepaint UK Effect Stencil as suggested and loaded my
sponge with some Grimas Black 101.
Not looking too great at this stage,
but a covering of Grimas Pearlised Silver 710 was my starting point. Having looked at the evil one again, I realised that there are lots of tones and
a texture to cope with. So I sponged some Wolfe Brothers white in the eye area and grabbed my Facepaint UK Effect Stencil as suggested and loaded my
sponge with some Grimas Black 101.
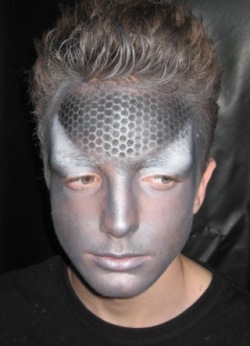
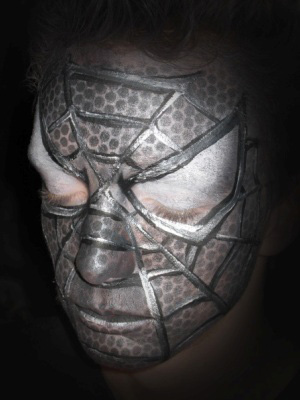
Keeping the stencil carefully in place, and making sure it was vertically straight I took a deep breath, and hey presto! Spiderman suit texture.
I carried on over the rest of the face, again making sure that the stencil was vertical, you can match the 'dots' if you overlap it slightly each time.
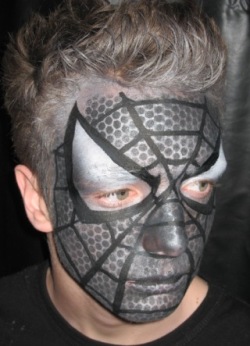
After outlining the eyes with a DaVinci Harbin No.6 it wasn't too difficult to add the lines with a liner brush. I don't usually go over the nose and mouth, but it seemed a shame not to with this impressive backgound.
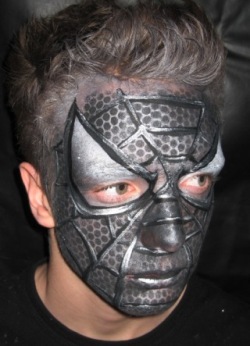 This time I tried highlighting with
Grimas Pearlised White 704, with a Grimas S2 brush for control. It looked better in 'real life' as there is an interesting sheen as the subject moves.
This time I tried highlighting with
Grimas Pearlised White 704, with a Grimas S2 brush for control. It looked better in 'real life' as there is an interesting sheen as the subject moves.
And finally, without even asking, I added loose silver glitter just to the eyes. Again it looked fantastic as Henry moved, but doesn't show in the photo.