We are closed from the 8th of July, till the 14th of July.
Any orders or questions after the 7th will be seen to from the 14th when we reopen!
---
Thank you for your patronage and understanding.
We are offfering a 15% discount on all DFX Neons pots with the discount code: SummerVibes
Mar 15, 2017
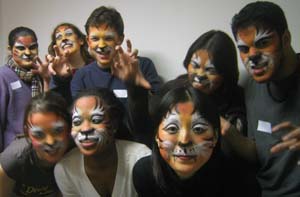
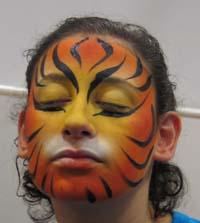
This is the basic Tiger that we teach at The London School of Face Painting. It is not just a beginners Tiger, we all need to be able to do a very fast tiger for busy queues as well as the beautiful designs that facepainters sent in for the competition. Even the most simple face paint will look good if the paint is applied well.
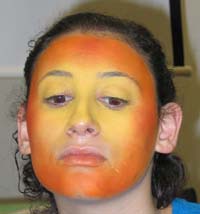 First step is to sponge orange
around the outside of the face then yellow across the centre of the face blending the two colours seamlessly together. "Blush" cheeks and temples with
chestnut brown, Grimas 1075 works well ,and blend into the make up so that there are no hard lines just colours softly flowing into each other.
First step is to sponge orange
around the outside of the face then yellow across the centre of the face blending the two colours seamlessly together. "Blush" cheeks and temples with
chestnut brown, Grimas 1075 works well ,and blend into the make up so that there are no hard lines just colours softly flowing into each other.
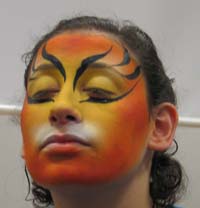 Sponge white on either side of
the top lip this should be clean white and in a neatly defined area to give the impression of a muzzle. Sponge white above the eyes too. Define the
eye area with flowing black lines. Use a no 8 brush and bring the lines to a point by lifting the brush so that you just use the tip, press for the
full width of the brush.
Sponge white on either side of
the top lip this should be clean white and in a neatly defined area to give the impression of a muzzle. Sponge white above the eyes too. Define the
eye area with flowing black lines. Use a no 8 brush and bring the lines to a point by lifting the brush so that you just use the tip, press for the
full width of the brush.
 Place flowing black lines around
the face radiating out from the centre of the face.
Place flowing black lines around
the face radiating out from the centre of the face.
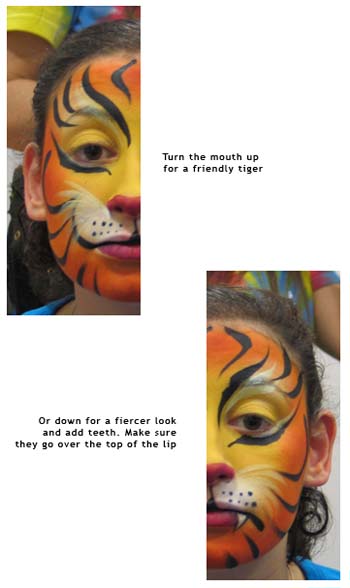
 Decide on the mouth shape you
want to use.
Decide on the mouth shape you
want to use.
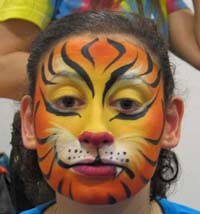 Paint in whisker dots, we reccomend
using a Grimas S2 brush for fool proof perfect dots. Give your tiger a pink nose and bottom lip.
Paint in whisker dots, we reccomend
using a Grimas S2 brush for fool proof perfect dots. Give your tiger a pink nose and bottom lip.